This tutorial will teach you how to use Dreamweaver 8 and its ASP.NET to create a Login function for your ASP.NET site. It’s a little complicated, but I will go through it step by step to help people understand it more. I did this for a project in one of my classes. So I want to give credit to my professor (Raj) for providing the scripts and help.

In this tutorial, I will teach you how to create a Login form.
Step1: Setting up work space.
For this to work you will need to have the software below installed.
- Dreamweaver 8, this is what I used in the tutorial. I am not sure if you can do this on the previous versions.
- Windows XP Professional
- (IIS) Internet Information Services has to be installed.
- Follow this tutorial to install IIS ( Click Here )
At this point, I will take it that you have IIS set up and you are able to access a database from Dreamweaver.
Step2: Setting up your web site.
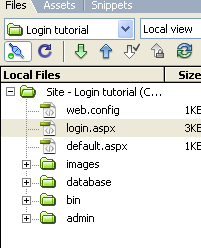
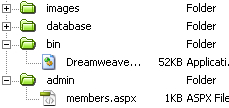
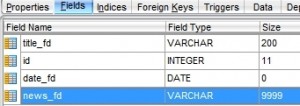
If you have IIS installed you should see the Inetpub folder in your C:\ drive. OpenC:\Inetpub\wwwroot\ create a folder with the name of your site. Inside your site folder create these folders, database, admin, images, and bin. I am not going through the process of actually creating the database, click playerinfo and download the database that I created, unzip it and place the file into your C:\Inetpub\wwwroot\mysite\database folder. Again, read up on installing IIS on how to link your database this is very important nothing will work if you don’t.
Step3: Setting up Dreamweaver.
Open Dreamweaver, Click Site> New Site, fill in the information shown below.


In my example where is says, pixeldigest_login_test. You will replace this will your sites folder name. Click ok, and Done when you are finished.
Step4: Creating the connection to the database.
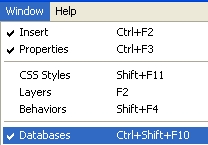
Click File> New… and click on Dynamic Page> ASP.NET VB and click Create. Hit Ctrl+Sand save your site as login. After that click on the Windows tab and make sure Databases is checked.
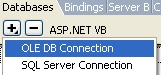
Click on the > Shown in the databases tab and click on OLE DB Connection
With that fill in the information below.
Connection Name: loginTest
Next click on the Build Button and the window blow should come up
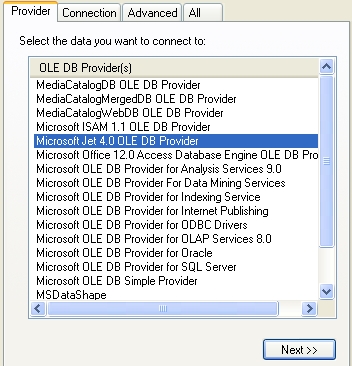
From the Provider tab select “Microsoft Jet 4.0 OLE DB Provider” and click Next. With that the window below should come up.

Click on the button next to the “Select or enter a database name” and browse to your database file. Mine is
C:\Inetpub\wwwroot\pixeldigest_login_test\database\playerinfo.mdb
After that, Hit the Test Connection Button, and it should be successful with that click ok. Make sure your connection string looks similar to what I have below.
“Provider=Microsoft.Jet.OLEDB.4.0;
Data Source=C:\Inetpub\wwwroot\pixeldigest_login_test\
database\playerinfo.mdb;
Persist Security Info=False”
At this point you should be in the OLE DB Connection window, click on the test button
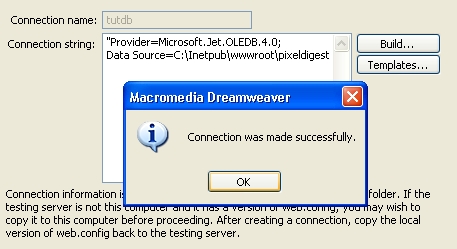
The test should be Successful
Step5: Creating the DataSet.
In the Application window select Bindings

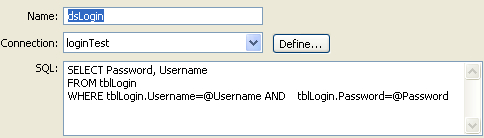
Click on the Shown in the Bindings tab and select Dataset(Query) make sure that you are on the Advanced window. With that select and fill in the information shown below.
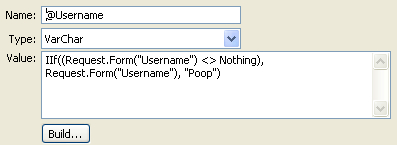
Click on the next to parameter and fill in the information for the username shown below.
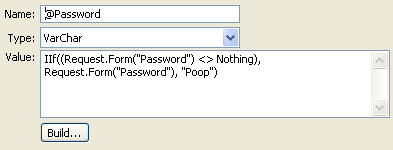
Click on the again and add the password information.
With that click ok, your window should look similar to what I have below.

Click ok to exit.
Step6: Creating the login form.
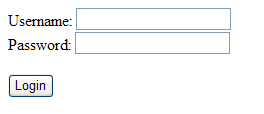
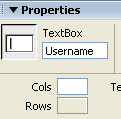
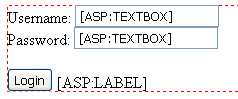
Click, Insert > ASP.NET Objects> asp:TextBox, Insert two asp textbox. It should look similar to what I have below.

Click to select the Username textbox. With that the properties window should come up make sure the TextBox name is Username
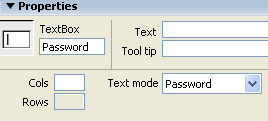
With that select the Password TextBox, and fill in the information below.
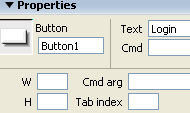
Click, Insert > ASP.NET Objects> asp:Button, Insert a button with the properties shown below.
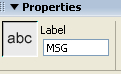
Also add a Label this will display a message when the user type in a wrong password or username. In the label properties make sure the Label is MSG
Your login should look similar to what I have below.
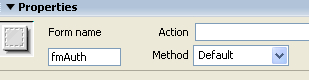
You should see the Form, this is the red dotted line going around your form. Click on it and in the properties window add the information shown below
That is it for the form. Change to Code view, locate where it says Debug=”true” and place this code above it.
Expression='<%# isPostBack %>’

Next locate

copy and paste the code under the line shown above.
<script runat=”server”>
Sub Page_Load(Src As Object, E As EventArgs)
If IsPostBack Then
‘ authenticate user
if ((Username.Text = dsLogin.FieldValue(“Username”)) AND (Password.Text = dsLogin.FieldValue(“Password”)) AND Username.Text <> Nothing AND Username.Text <>”” AND Password.Text <> Nothing AND Password.Text <>””)FormsAuthentication.RedirectFromLoginPage(Username.Text, false)
else
Msg.Text = “Incorrect Username or Password”
end if
DataBind()
End If
End Sub
</script><script runat=”server”>
Sub Page_Load(Src As Object, E As EventArgs)
If IsPostBack Then
‘ authenticate user
if ((Username.Text = dsLogin.FieldValue(“Username”)) AND (Password.Text = dsLogin.FieldValue(“Password”)) AND Username.Text <> Nothing AND Username.Text <>”” AND Password.Text <> Nothing AND Password.Text <>””)FormsAuthentication.RedirectFromLoginPage(Username.Text, false)
else
Msg.Text = “Incorrect Username or Password”
end if
DataBind()
End If
End Sub
</script>
Here is the full Login page Script.
<%@ Page Language=”VB” ContentType=”text/html” ResponseEncoding=”utf-8″ %>
<%@ Register TagPrefix=”MM” Namespace=”DreamweaverCtrls” Assembly=”DreamweaverCtrls,version=1.0.0.0,publicKeyToken=
836f606ede05d46a,culture=neutral” %>
<MM:DataSet
id=”dsLogin”
runat=”Server”
IsStoredProcedure=”false”
ConnectionString='<%# System.Configuration.
ConfigurationSettings.AppSettings
(“MM_CONNECTION_STRING_loginTest”) %>’
DatabaseType='<%# System.Configuration.ConfigurationSettings.
AppSettings(“MM_CONNECTION_
DATABASETYPE_loginTest”) %>’
CommandText='<%# “SELECT Password,
Username FROM tblLogin WHERE tblLogin.Username=@Username AND tblLogin.Password=@Password” %>’
Expression='<%# isPostBack %>’
Debug=”true”
><Parameters>
<Parameter Name=”@Username” Value='<%# IIf((Request.Form(“Username”) <> Nothing), Request.Form(“Username”), “Poop”) %>’ Type=”VarChar” />
<Parameter Name=”@Password” Value='<%# IIf((Request.Form(“Password”) <> Nothing), Request.Form(“Password”), “Poop”) %>’ Type=”VarChar” />
</Parameters></MM:DataSet>
<MM:PageBind runat=”server” PostBackBind=”true” />
<script runat=”server”>
Sub Page_Load(Src As Object, E As EventArgs)
If IsPostBack Then
‘ authenticate user
if ((Username.Text = dsLogin.FieldValue(“Username”)) AND (Password.Text =
dsLogin.FieldValue(“Password”)) AND Username.Text <> Nothing AND Username.Text <>”” AND Password.Text <> Nothing AND Password.Text <>””)FormsAuthentication.RedirectFromLoginPage(Username.Text, false)
else
Msg.Text = “Incorrect Username or Password”
end if
DataBind()
End If
End Sub
</script>
<!DOCTYPE html PUBLIC “-//W3C//DTD XHTML 1.0 Transitional//EN” “http://www.w3.org/TR/xhtml1/DTD/xhtml1-transitional.dtd”>
<html xmlns=”http://www.w3.org/1999/xhtml”>
<head>
<meta http-equiv=”Content-Type” content=”text/html; charset=utf-8″ />
<title>Login Test</title>
</head>
<body>
<form name=”fmAuth” id=”fmAuth” runat=”server”>
<p>Username:
<asp:TextBox ID=”Username” runat=”server” />
<br />
Password:
<asp:TextBox ID=”Password” runat=”server” TextMode=”Password” /></p>
<p>
<asp:Button ID=”Button1″ runat=”server” Text=”Login” />
<asp:Label ID=”MSG” runat=”server” /> </p>
</form>
</body>
</html>
Step7: Editing the web.config file.
In your file window you should see a file called web.config. Click on it and open it
Locate where it says
<appSettings>
….
</appSettings>
and copy and paste the information below after the </appSettings>
<!– enable Forms authentication –>
<system.web>
<authentication mode=”Forms”>
<forms name=”fmAUTH” loginUrl=”/yoursite_path/login.aspx” />
</authentication>
<!– Require authorization for all files in the “member” subdirectory. –>
</system.web>
<location path=”admin”>
<system.web>
<authorization>
<deny users=”?” />
</authorization>
</system.web>
</location>
<system.web>
<compilation debug=”true” />
</system.web>
The loginUrl=”/yoursite_path/login.aspx will change depending on your path.
With that save the web.config file.
Click File> New… and click on Dynamic Page> ASP.NET VB and click Create. Hit Ctrl+Sand save your site as members. Place this file into the admin folder.
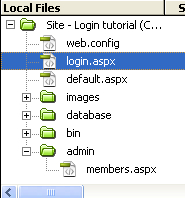
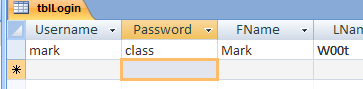
Type something simple on the member’s page so you can identify it when you log in. The database contains the username and password that I created.
Save everything, close Dreamweaver, and download this DreamweaverCtrls file. After downloading it, unzip it and click on the file, which should install itself into Dreamweaver. Open Dreamweaver, and open the login page you previously created. Click Site>Advanced Deploy Supporting Files

After that click Deploy. If you open the bin folder, the DreamweaverCtrls file should be about 52kb
To test this on your local machine you will need to create an application in IIS for your website.
The pages you want to protect add this script under the meta tag.
<%
IF Session(“login”) <> true Then
Response.Redirect(“../login.aspx”)
END IF
%>
Click on Start> Control Panel> Administrative Tools > Internet Information Services
Expand the Default Web Set and select your site, as shown below.

Right click on your site and select Properties. You should see the window below, click on Create
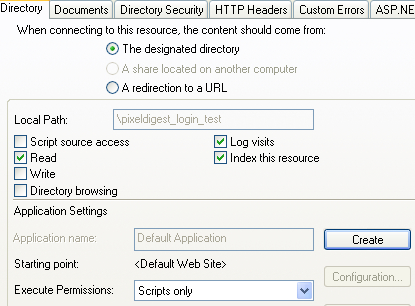
Apply and close the IIS window.
Well that is it.
Finished: