In this tutorial, I will teach you how to create a simple PHP news system. This tutorial includes a form that is linked to the news page. It is explained with step-by-step details and pictures.
- WAMP5: http://www.wampserver.com/en/index.php
- Installing WAMP will automatically create a www folder located in C:\wamp\www
- Create two folders in the www folder called, localroot and webroot
- In the localroot and webroot folder create a folder that will correspond to your site example: trickdigest
- In the site name folder located in local and webroot folders create an image folder. Your folder tree should look like C:\wamp\www\webroot\trickdigest\images EMS SQL Manager for MySQL (WAMP5 comes with a SQL manager, you can use it, or whichever one you are familiar with.
- Go to http://www.tom-muck.com/extensions/help/HorizontalLooper/
- download and install the extension.
Step1: Create and Setup database
Open EMS and Create a database called trick_NEWS1,

Click next, and you will see the window below.
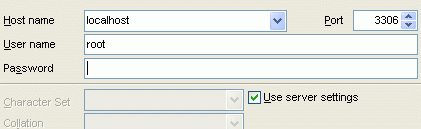
Click next and Finish. When you do that you should see the Registration database window. Just click ok. Next click on the User Manager Icon.

Change the Servers to Localhost and click ok. At this point click on the Add User Icon.

your username and password will be different. Make sure to select All Privileges and With Grant option. With that click ok to apply the settings. Double click on the database you just created.

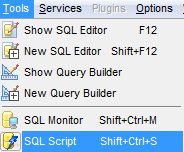
When you do that you will connect to the database, Click on Tools > SQL Scripts
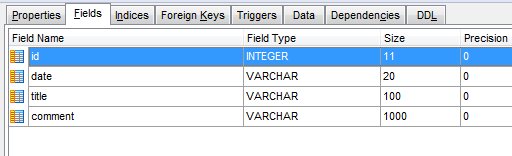
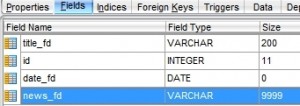
Copy and paste the script below, this will create the table and fields.
CREATE TABLE `news_tb` (
`id` int(11) NOT NULL auto_increment,
`date` varchar(20) default NULL,
`title` varchar(100) default NULL,
`comment` varchar(1000) default NULL,
PRIMARY KEY (`id`),
UNIQUE KEY `id` (`id`)
) ENGINE=InnoDB AUTO_INCREMENT=13 DEFAULT CHARSET=latin1;
In doing that you will create the table below.
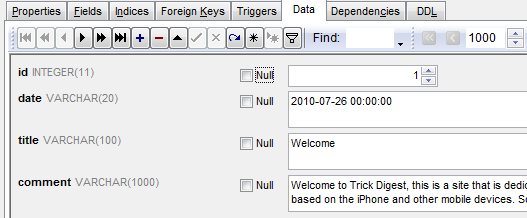
Click on the data field and insert some information. This is will will be displayed in the news section.
Step2: Creating site in Dreamweaver
Ok, at this point we have the database created and download the files. Open dreamweaver, click New Site
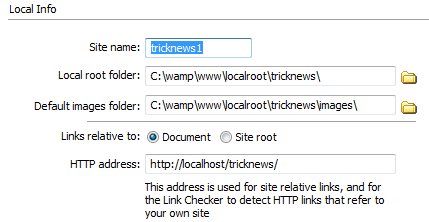
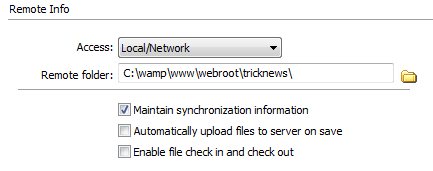
In doing that you will see the window below. Fill in the information.
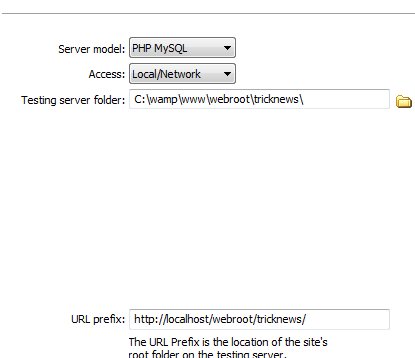
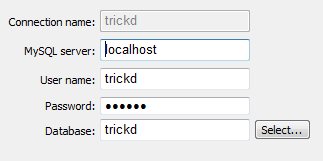
At this point you should have the database created with the tables and the Dreamweaver site created. Now we need to connect to the database and display the content of it. Click on Databases.

This will bring up the window below. Fill in the information, use the username and password you created earlier using EMS.
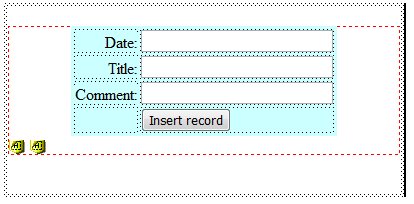
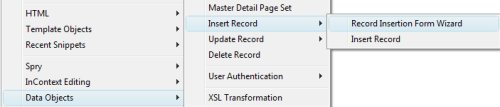
Step3: Form.php
Create two .php pages. One called news.php and form.php. Open the form.php, here we will add the submit form.Click Insert > Data Object > Insert Record > Record Insertion Form Wizard.
When you do that the window below will come up.
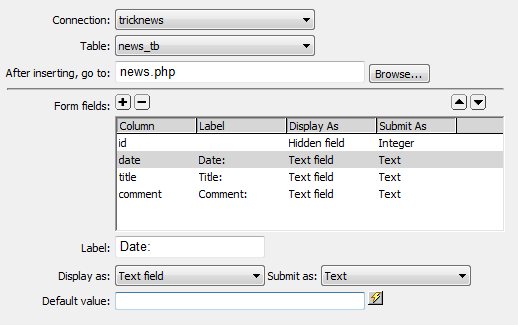
Fill in the information as shown and click ok. The form below will be created.
Copy the code below and paste it in the head code of your page.
<script src=”http://js.nicedit.com/nicEdit-latest.js” type=”text/javascript”></script>
<script type=”text/javascript”>bkLib.onDomLoaded(nicEditors.allTextAreas);</script>
you can visit : http://nicedit.com/index.php
for more information
Step4: news.php
Open the News.php page, create the table shown below. You can copy and page the code into Dreamweaver code view.
<table width=”400″ border=”0″ cellspacing=”2″ cellpadding=”2″>
<tr>
<td><table width=”400″ border=”0″ cellspacing=”2″ cellpadding=”2″>
<tr>
<td> </td>
</tr>
<tr>
<td> </td>
</tr>
<tr>
<td> </td>
</tr>
</table></td>
</tr>
</table>
With doing that you will have the tables shown below.

Click ok, and click Bindings

Click on and select Recordset. Create the recordset below.
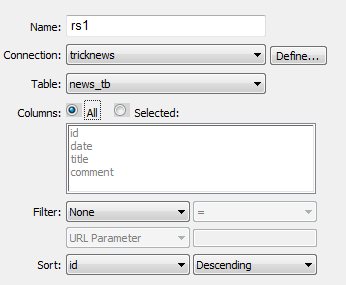
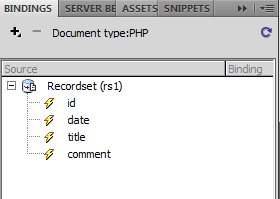
Click on the (+) next Recordset, you will see the fields shown above.
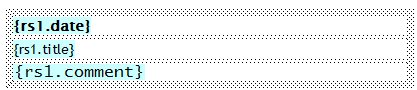
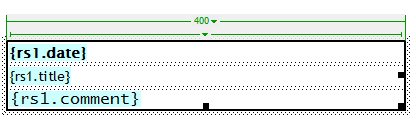
Click and Drag the title field over to the table as shown below.
Press F12 to preview the page and if anything was down correctly you should see the news you added into the database.
If you just get the name double check the database, the image path maybe incorrect.
If you get errors, make you after you create the page you click on the Put Files
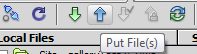
To upload the files.
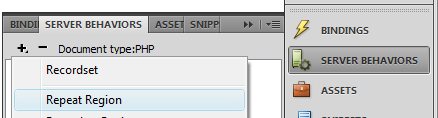
Click and select the table.
Click on Server Behaviors and select Repeat Region. The is how many items in the database you want to be displayed.
Set the number to 10. This will change depending on what you want.
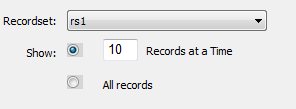
Click ok, and preview the page.
Finish: