Introduction: In this tutorial I will teach you how to add a cloud image in the skies, very simple tutorial and its creates a realistic look. If you are having problems feel free to e-mail us, or post a message.
Step1: Setting up work space.
Create a new image using the dimension 800 x 600. Set the background color to #1867e9. This will represent the color of the sky. Create a new layer, Layer> New> Layer… (Shift+Ctrl+N). Name this layer Shape
Step2: Adding the shape to the sky.
Click and hold down the mouse on the Custom shape tool (U) in doing that you will see a little menu select the custom shape tool. Make sure you have the same setting as shown below.

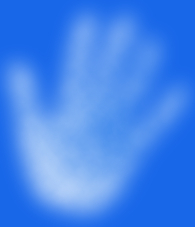
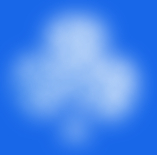
Draw a small heart in your work area as shown below, you can change the color to see it better. The color at this point does not matter.

While holding Ctrl click on the layer to select it.

With the layer still selected, create a new layer and name it Cloud Image, Your foreground and background colors needs to be similar to what I have below.

Blue = 317fea
White = ffffff
Step3: Creating the cloud.
Click Select> Modify> Feather
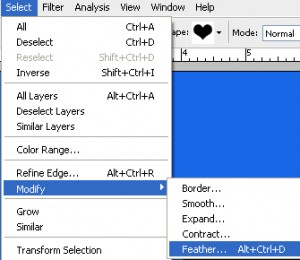
Change the Feather Radius to 10 and click ok.

You should be on the Cloud Image Layer. Click Filter> Render Clouds

Now delete the Shape layer and you are finished.

Finished:
Well that is it, hope it came out to what you expected. If you have any question or comment about this tutorial, feel free to post a message